
Individual E-Invoices
To submit an individual E-Invoice, you must first complete the E-Invoice Setup. Refer to the E-Invoice Setup Guide for detailed instructions on how to complete the setup.
Once your setup is complete, you can submit the individual E-Invoice using any of the following modules: AR Invoice, Sales Invoice, or Cash Sales. After creating the transaction, submission can be done either from the Listing or Entry screen.
To submit your E-Invoice from the Listing Screen, follow these steps:
- Select the transactions you wish to submit. This can be done by simply checking the box next to each transaction.
- Click the Submit button located on the screen. This action will initiate the submission of the selected transactions to the MyInvois Portal.
- Once the submission is complete, the Listing Screen will automatically refresh, showing the updated E-Invoice status for all the transactions.
If you notice that the status of your E-Invoice does not reflect the latest updates, or if a transaction has been Cancelled on the MyInvois Portal, you can easily refresh the status by clicking the Refresh button.
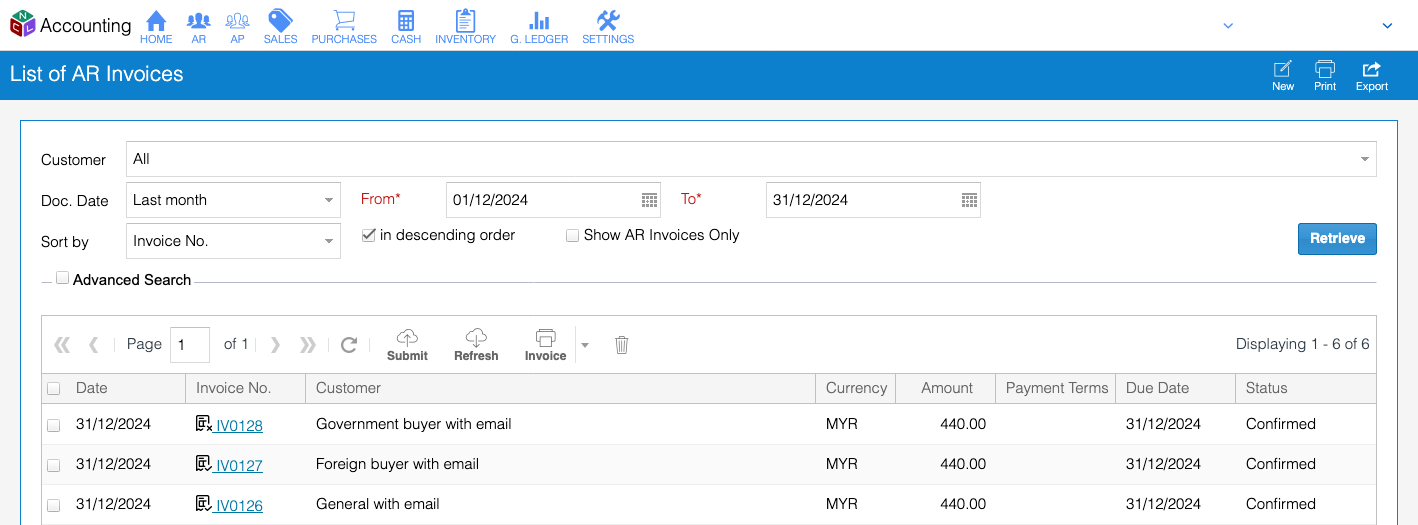
Status Indicators
In the AR Invoice, Sales Invoice, or Cash Sales module, on the listing screen, you’ll find icons next to the Invoice Number to indicate the E-Invoice status:
 : Status is New.
 : Status is Submitted or Valid.
 : Status is Invalid or Cancelled.
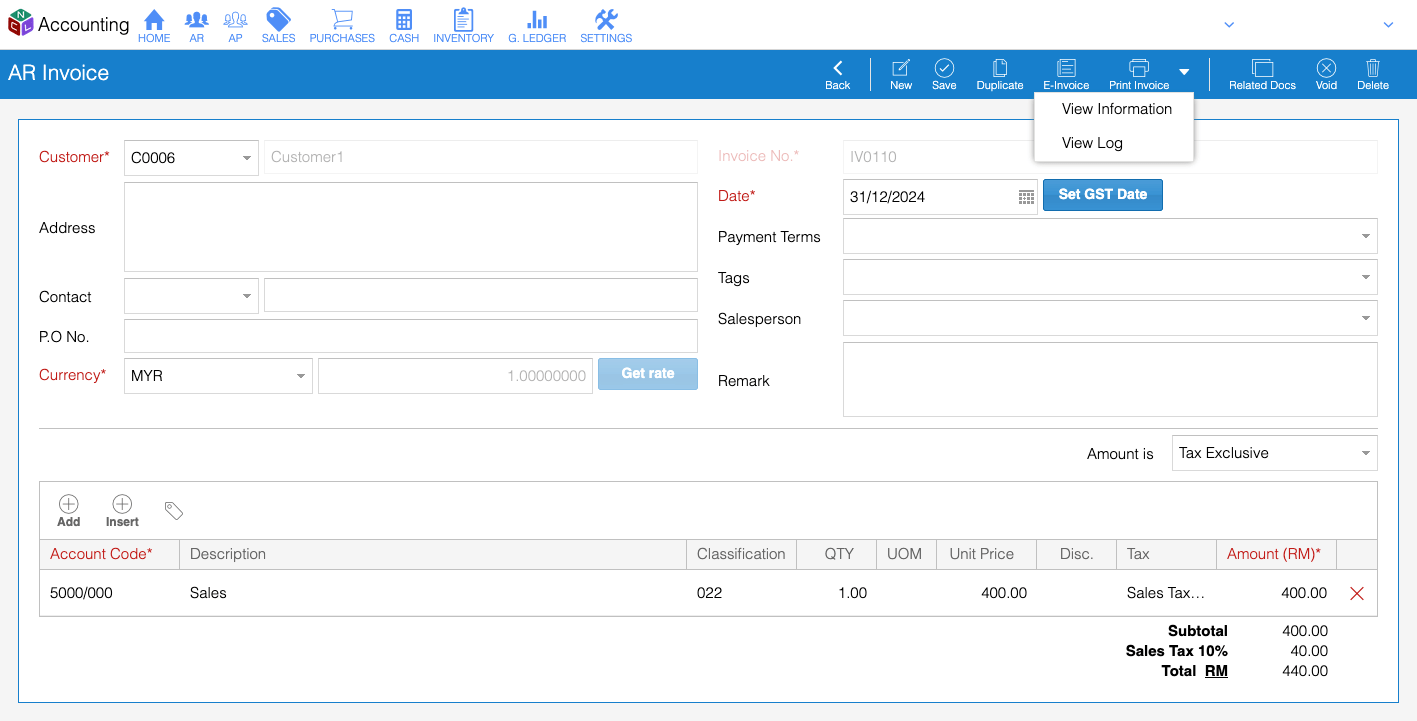
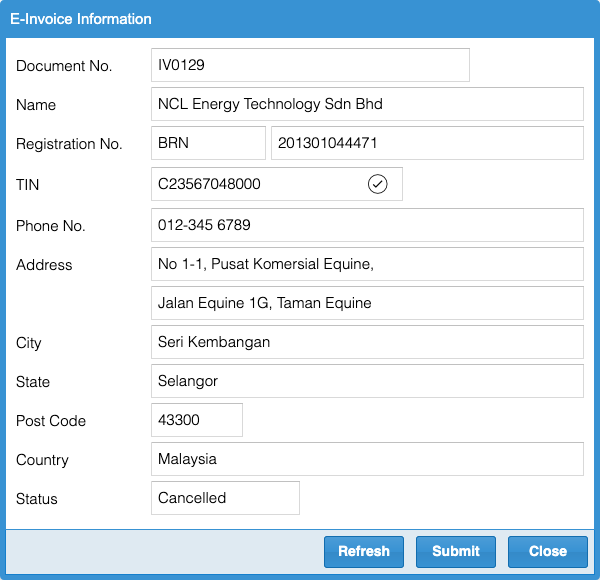
On the Transaction Entry screen, locate the E-Invoice button next to the Duplicate button. In the dropdown menu, you’ll see two options:
- E-Invoice Information: Review and update transaction details before submission. Ensure all required fields are filled, and then click Submit to send the transaction to the MyInvois Portal. If you need to cancel the E-Invoice within 72 hours, check the Cancel E-Invoice box, enter a Cancel Reason, and click Submit again.
- E-Invoice Log: View a log of all submission activities, including submission dates and the user who performed the action.
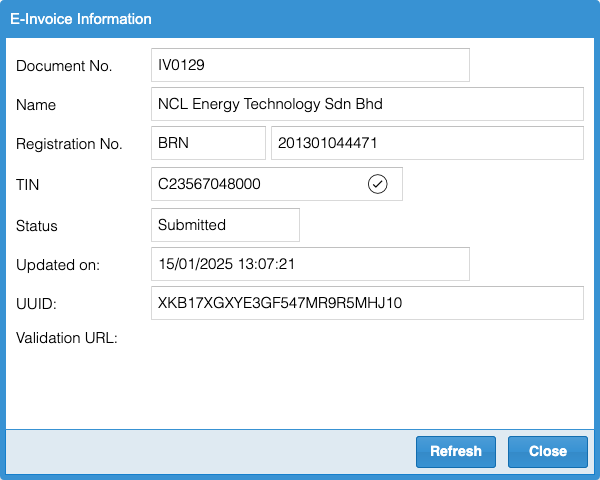
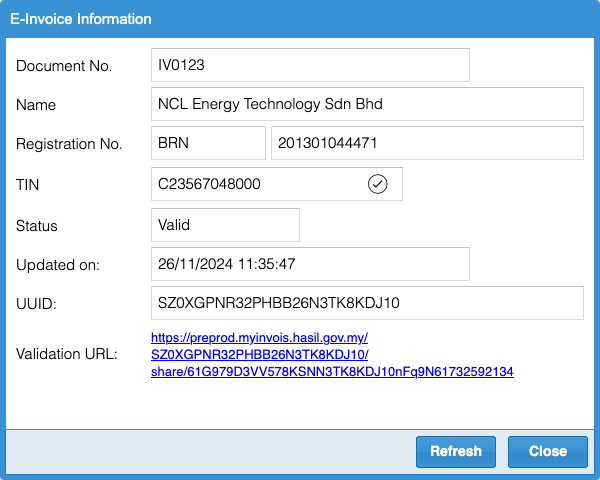
E-Invoice Statuses
There are several E-Invoice statuses you should be aware of:
- New: The transaction has not yet been submitted to the MyInvois Portal.

- Submitted: The transaction has been successfully submitted to the MyInvois Portal but has not yet received a Valid status. You can click the Refresh button to retrieve the latest status.
- Valid: The transaction has been successfully submitted and has received a Valid status from the MyInvois Portal. A validation link will be available for verifying the transaction in the MyInvois Portal.
- Cancelled: The transaction was valid but has been cancelled.
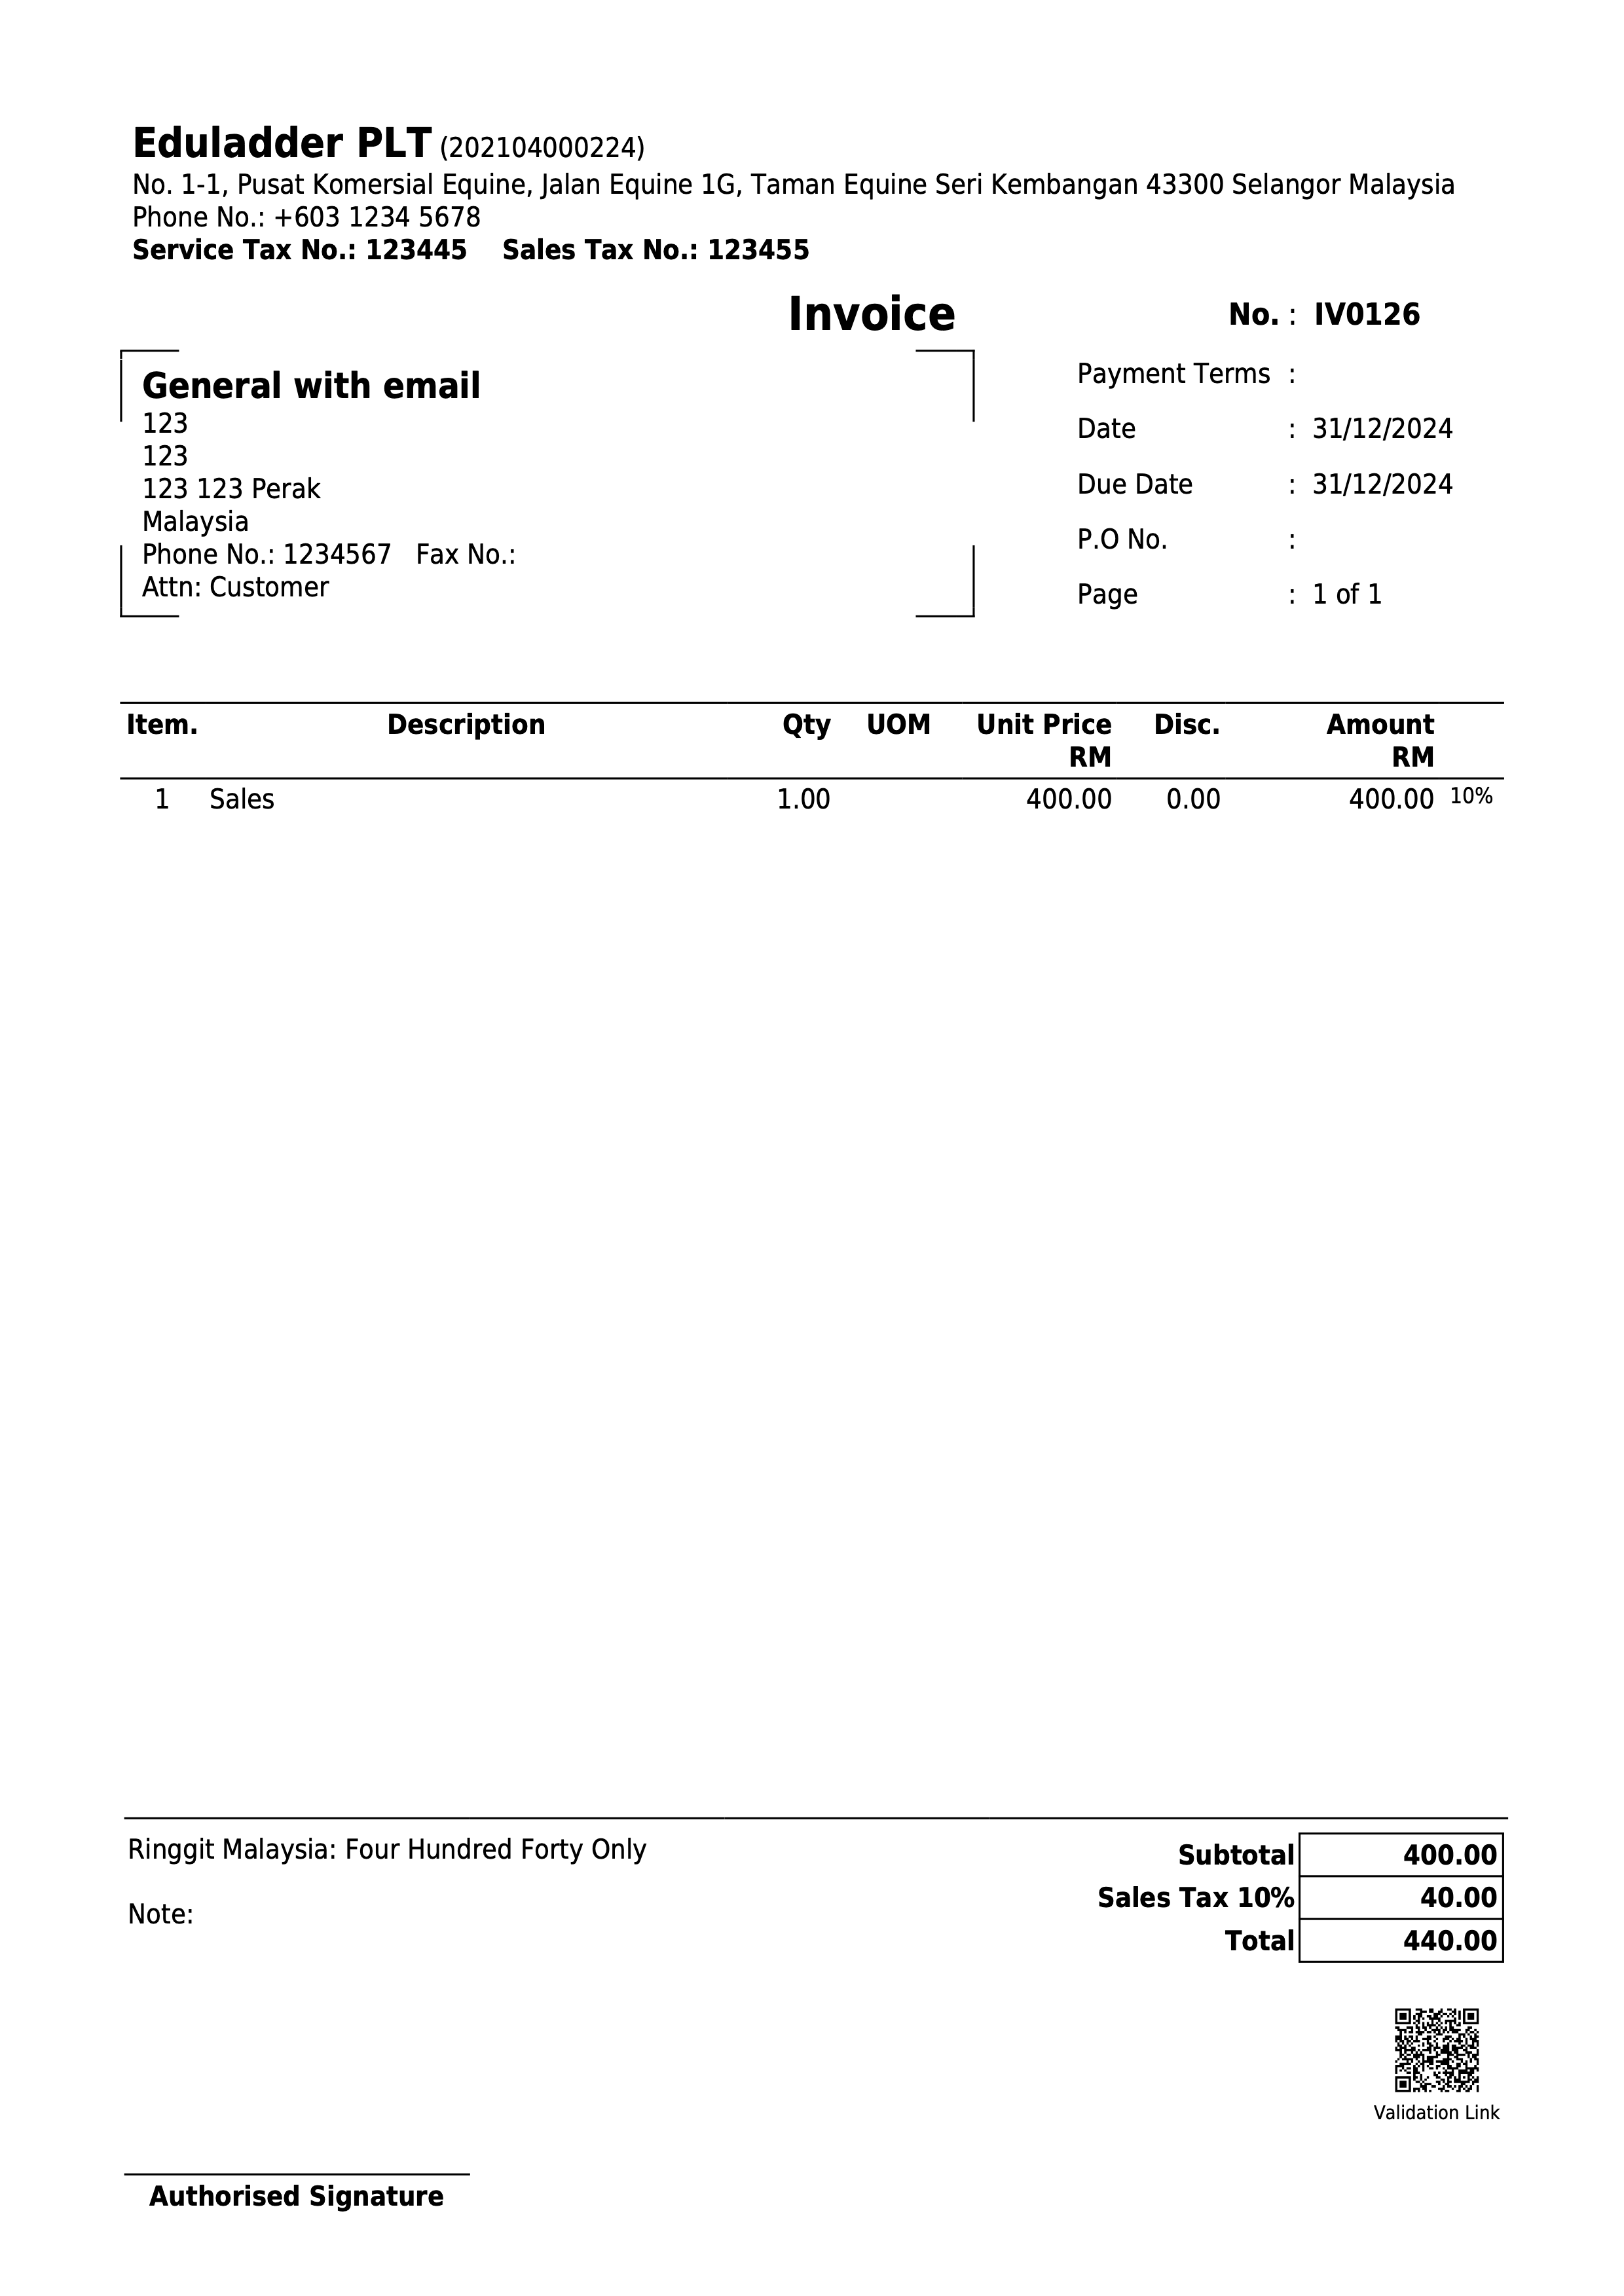
Printing Transactions with Valid E-Invoice Status
When printing a transaction with a Valid E-Invoice status, a QR code will appear at the bottom-right corner. This QR code can be scanned to access the E-Invoice Validation Link.
If the E-Invoice status is Valid or Submitted, the transaction cannot be edited, voided, or deleted.